Replicas of the RCA MI-4058A
Type 91-A Announce Pedestal
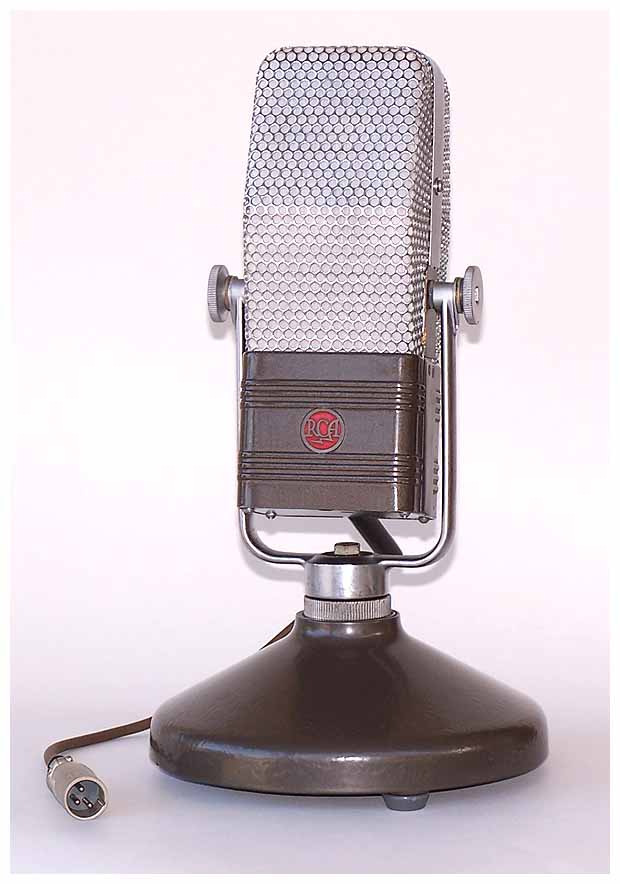
Accurate high-quality cast-iron replicas of the RCA Type 91-A mic stands for your 44-B or 44-BX are available in black or umber gray. Your mic must be equipped with the standard shock mount, to which the stand is attached with its three existing machine screws. The stands are priced at $149.95 each plus shipping from Vancouver, Washington 98682. An original RCA Type 91-A stand served as the model for our patterns and molds, which were used to pour castings just as RCA did in the thirties and forties. To see how this was accomplished by our team of professionals in 2004, scroll this page and be transported to Adolf’s Pattern Shop.
In order to be compatible with your new replica Announce Pedestal, your RCA Type 44 microphone must be equipped already with the standard RCA cushion assembly #58872, which you will attach using its three existing 8-32 machine screws.
How we make these pedestals

The first step in creating a product that is to be made of cast iron or aluminum is to locate an experienced “pattern maker” who has a good working relationship with the foundry that will be pouring the castings. In our case it is Adolf Volkmann of Adolf’s Pattern Shop, located in East Portland, Oregon, the only foundry in Portland that makes cast iron objects. The next step is for Adolf to take the original microphone base to the foundry workers to find out how they want the pattern made. Even though Adolf has years of experience, and has taught pattern-making, he knows that the foundry folks will have a preferred form for the pattern that will minimize the total cost based on the desired number of castings. Our pattern will be a dual version, giving us two bases per casting operation. Our pattern will cost more to make than some, but will result in a significantly lower cost for producing the one hundred bases we want.
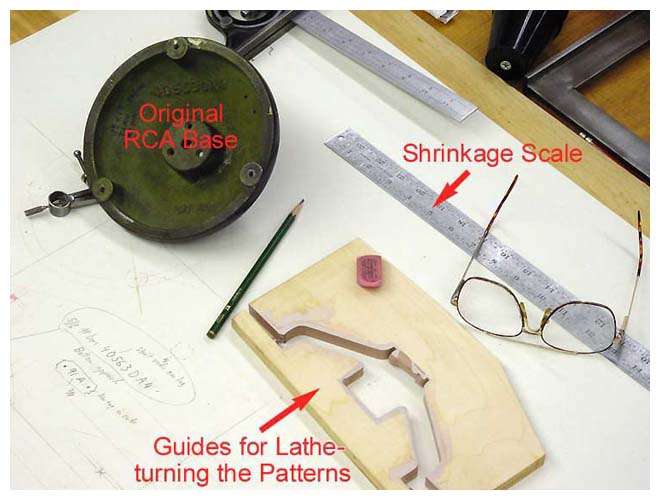
The next step is to take careful measurements of the original base and create drawings that will be used to make separate guides for the upper and lower surfaces of the base. These guides are made of wood and sanded putty, and will be used during the process of turning the hardwood patterns on a lathe. The measurements are taken with a special “shrinkage” metal scale that is calibrated to take into account the contraction of the cast iron material as it cools. There is a separate shrinkage scale for each type of metal that is to be cast. In our case, there will be two patterns, one for the top surface of the base, and another for the bottom surface. Adolf has patented and sells special plastic inserts that are used on the patterns to guarantee proper alignment. Patterns must be made so that obtaining precise alignment with the sand molds is relatively simple.
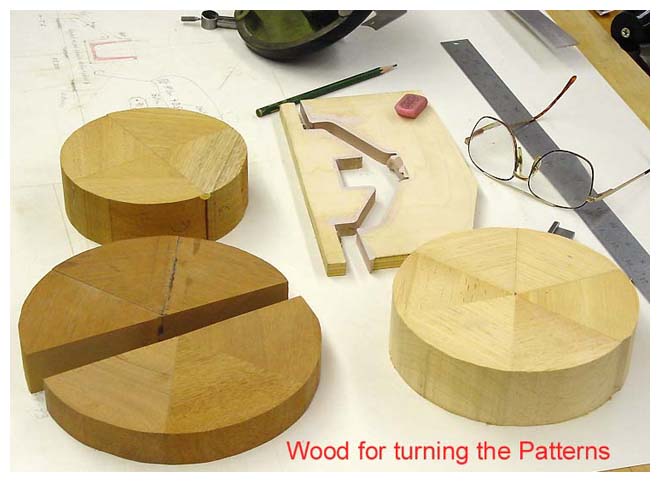
These are the hardwood pieces that will be glued together for lathe-turning the pattern elements. Notice that no end grain is at the surface to cause roughness that could not be sanded smooth. Details will be added later by carving and adding other wood or putty elements. Adolf has large custom-made lathes that can turn metal pieces as large as five feet in diameter and four feet deep! You don’t want to be around when these are spinning at several hundred RPM.
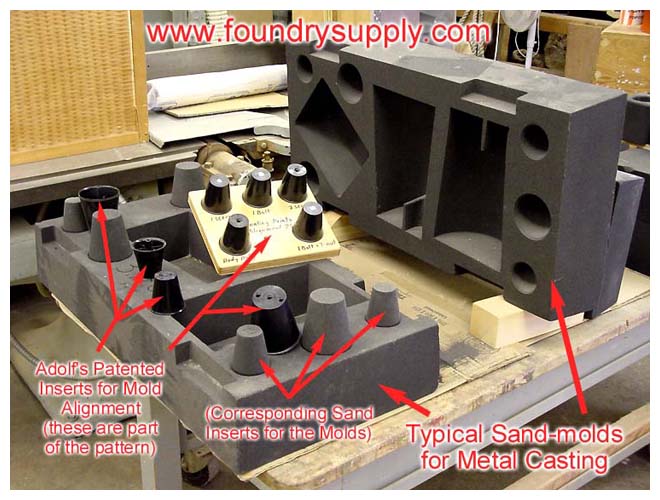
Here is someone else’s final sand mold showing Adolf’s patented plastic inserts for the patterns, and the resulting sand replicas of them to create perfect alignment. These inserts come in many sizes and are adjustable for different material depths. A variety of inserts is used for alignment in a single pattern and mold. If you are interested, you can Visit Adolf’s site.
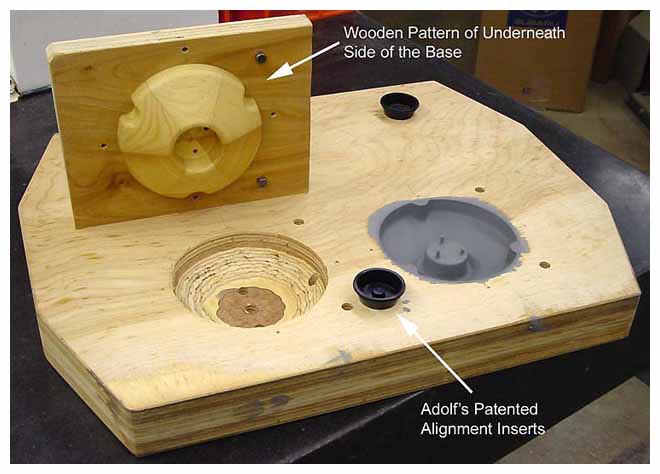
The next step in making our bases is for Adolf to turn a negative of the bottom of the base on the lathe. The mounting feet are made by drilling holes in the wood and then smoothing them by hand. The big wooden slab is made up of two pieces of thick birch plywood glued together. After the wood pattern is screwed down over a rough-cut hole in the slab, a plastic molding material is poured into the holes. The cavity fills with plastic, and the excess leaves the three vent holes in the center of the base. This produces three posts of plastic, which are then broken off.
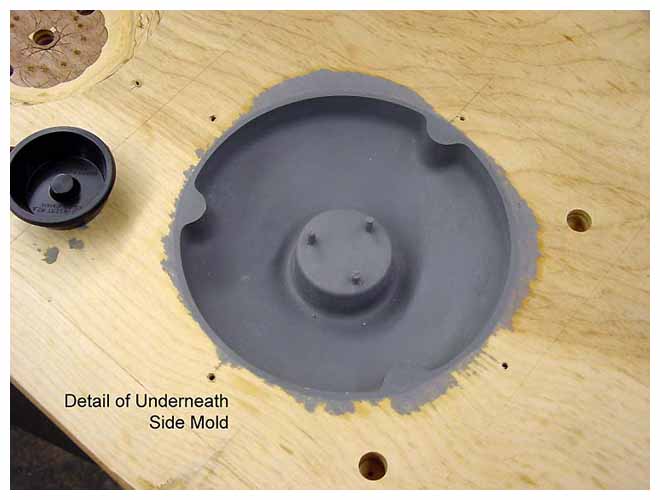
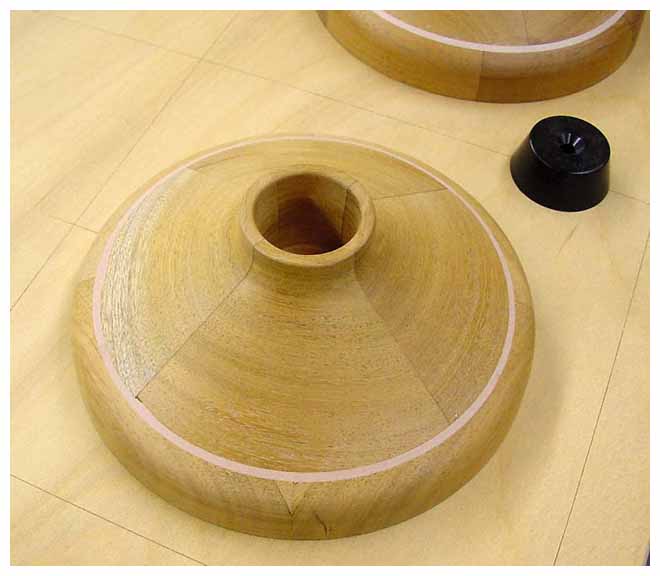
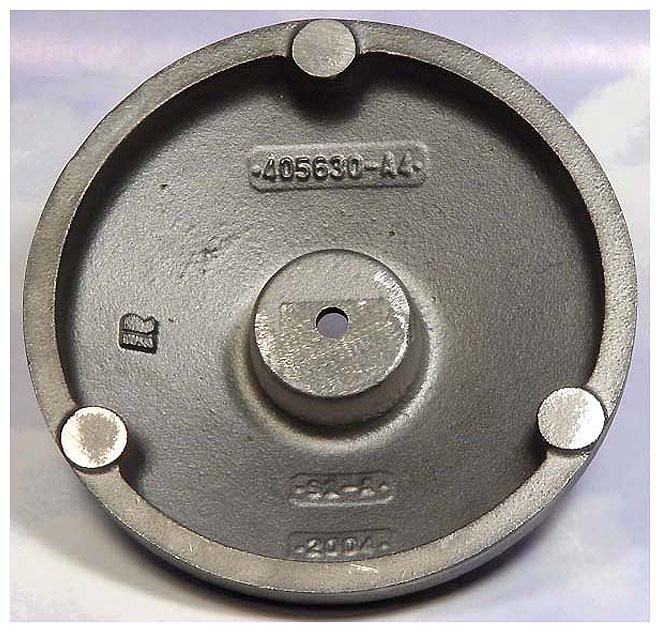
This is a close-up of one of the two molded patterns of the bottom of the base.
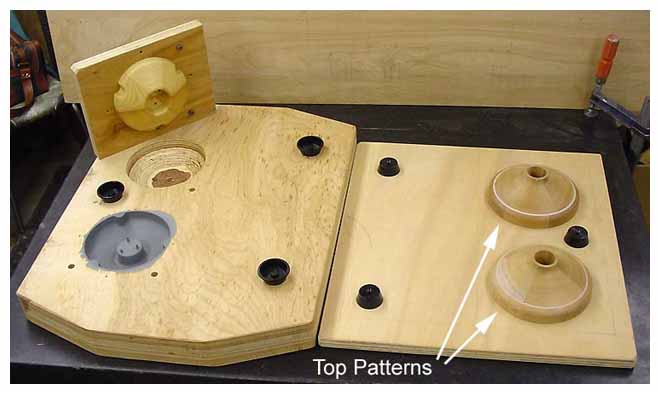
Now you can see the mating piece of plywood that contains the wooden patterns for the top of the base. Note the wood pattern is the positive, and a molding process is not necessary as it was for the bottom side of the base.
Here is a close-up of the positive wood pattern. That cool-looking inlay of white around the edge is actually the result of a mistake! Adolf took off too much material in that area, while turning on the lathe, and he had to fill it with putty. It perfectly fixes the problem.
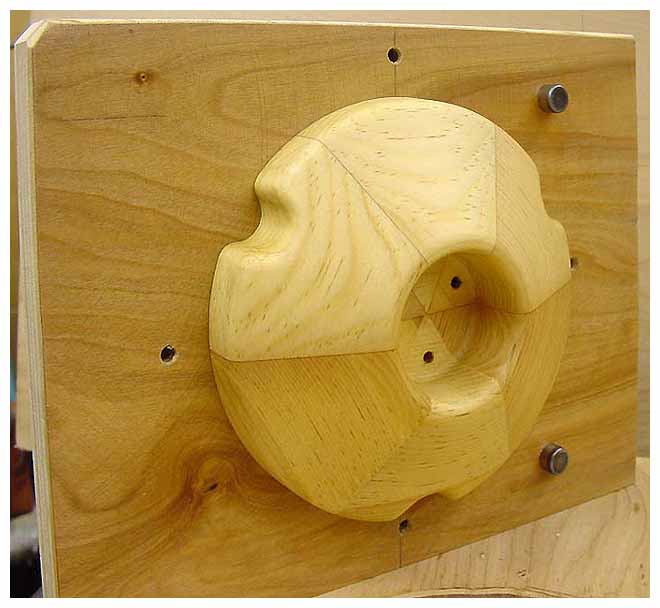
This is a close-up of the wooden negative pattern of the bottom. The two steel pins mate with precision holes drilled in the wooden slab for perfect alignment.
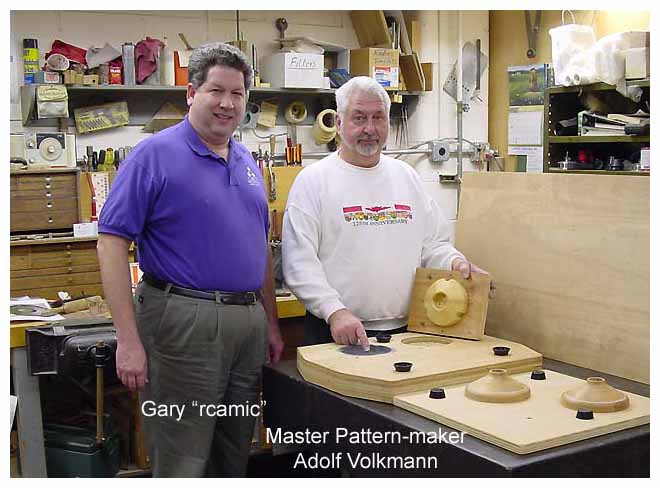
Meet Gary Sanders (eBay’s “rcamic”) and Adolf Volkmann (master pattern maker from Germany) in Adolf’s shop studying the progress of the patterns. Gary is fascinated by the details of the process, and is grateful that he has found such a devoted craftsman to authentically re-create the RCA 91-A bases.
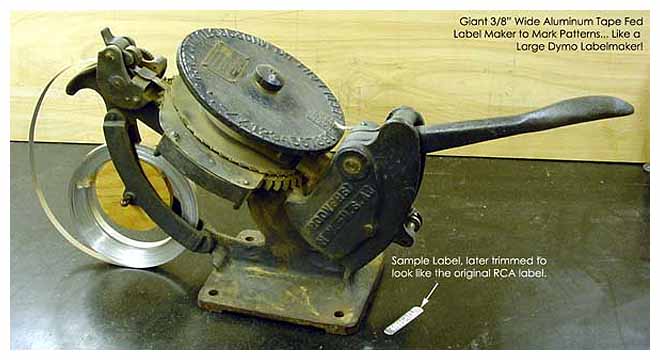
This is the giant label maker that Adolf uses to make labels for his patterns. Like a large version of the Dymo label makers sold in drug and office supply stores, it uses ⅜" wide aluminum tape. When a label is cut off, it has rounded ends. Adolf trimmed the ends to exactly match the original RCA labels that mark the underside of the 91-A base. He duplicated the rounded-head tacks, but the labels are actually applied to the pattern with adhesive. The labels are for the original RCA part number of the casting, the model number of the base, and we added the year (2004) to make sure these bases can be differentiated from originals.
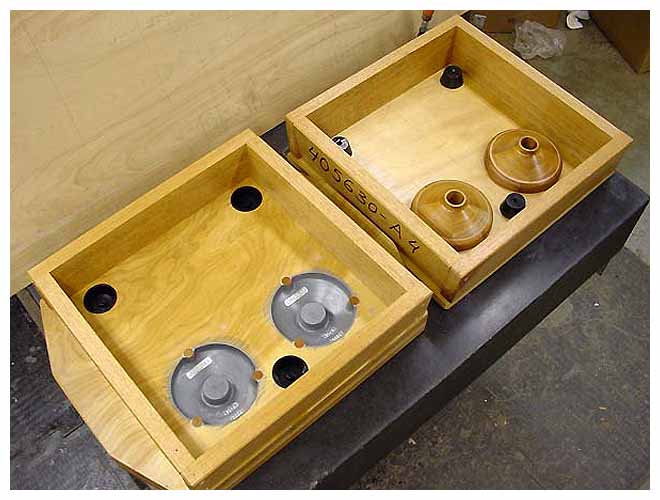
These are final patterns to be delivered to the foundry. The walls are solid mahogany, cut and assembled at an angle to allow removal of the sand castings. The pattern has been coated with shellac to protect it, and make casting removal easier. The three black plastic matching inserts are Adolf’s patented alignment inserts to guarantee perfect alignment at the foundry.
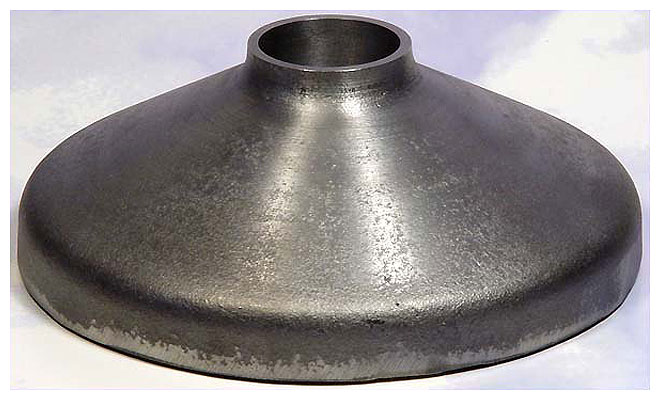
This is an unpainted base ready for boring. After each base is annealed, three holes will be drilled to accommodate securing the microphone shock mount, and three additional holes will be drilled and tapped for the feet. Finally, the bases will be painted and the feet attached.
Photos by Gary Sanders
|